I've discovered some fantastic nail art hacks that need just low-cost supplies you probably have at home. Instead of pricey polishes, try using colored markers or food coloring for vibrant designs. I love using washi tape for creating geometric patterns; just cut strips and paint over them for sharp lines. Old makeup brushes and bobby pins can become your new best friends for blending and dotting. Plus, kitchen sponges work great for ombre effects. With a bit of prep and a top coat, my designs last longer. Stick around to uncover even more budget-friendly tips!
Key Takeaways
- Use colored markers or food coloring as affordable nail polish alternatives to create vibrant designs without breaking the bank.
- Repurpose old makeup brushes and bobby pins to create intricate patterns and detailed designs in your nail art.
- Apply tape to create geometric patterns; paint over for sharp, clean lines that mimic professional nail art.
- Utilize household items like kitchen sponges for ombre effects and old toothbrushes for unique splatter techniques.
- Prep nails with a base coat and seal designs with a top coat for enhanced durability and long-lasting results.
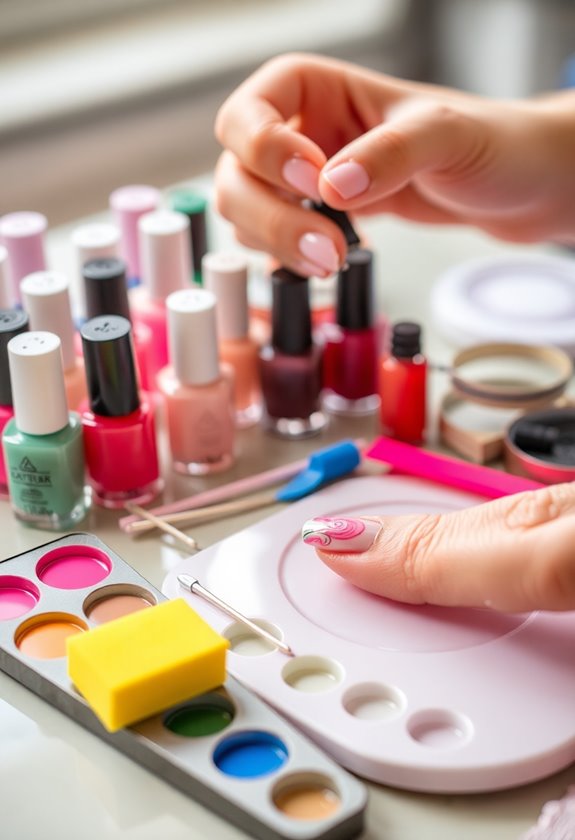
Essential Low-Cost Supplies
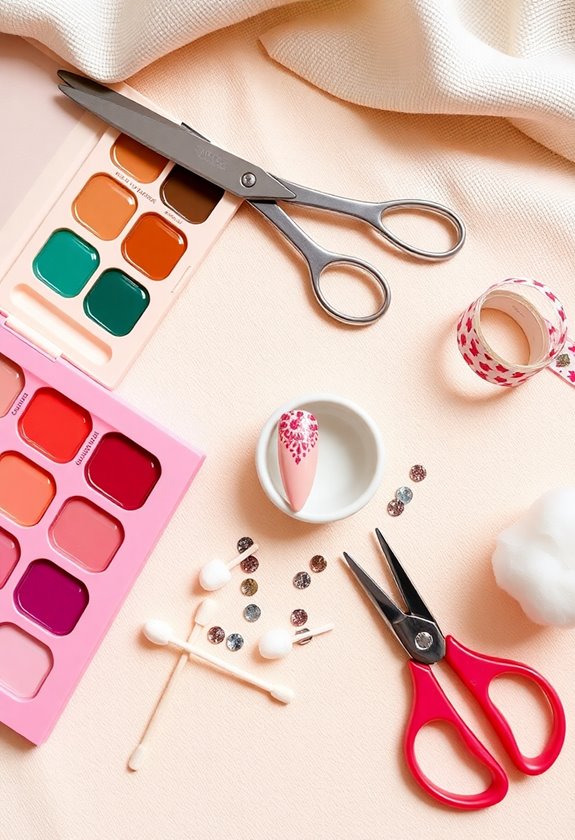
When it comes to nail art, having the right supplies doesn't have to break the bank. I've discovered some fantastic nail polish alternatives that are easy on the wallet. For instance, use colored markers or even food coloring to create vibrant designs without splurging on expensive polishes.
You can also explore budget-friendly embellishments like washi tape, stickers, or even glitter from craft stores. These items add a fun touch to your nail art without costing much.
I love mixing in these alternatives to keep my nail art fresh and exciting. So, don't hesitate to get creative with what you already have at home. Remember, it's all about expressing yourself without emptying your wallet!
DIY Nail Art Tools
Creating your own nail art tools can be a game-changer for achieving those intricate designs. I've discovered that with just a few low-cost supplies, I can whip up tools that rival the store-bought ones. Here are some of my favorites:
- Homemade dotting tools: Use a bobby pin or the end of a toothpick for perfect dots.
- Old makeup brushes: They're great for blending colors or creating fine lines.
- Toothpicks: Ideal for detailed work and nail art accents.
- Sponges: Perfect for ombre effects using nail polish alternatives like paint or even food coloring.
With these DIY tools, you'll be able to let your creativity shine and achieve stunning nail art without breaking the bank!
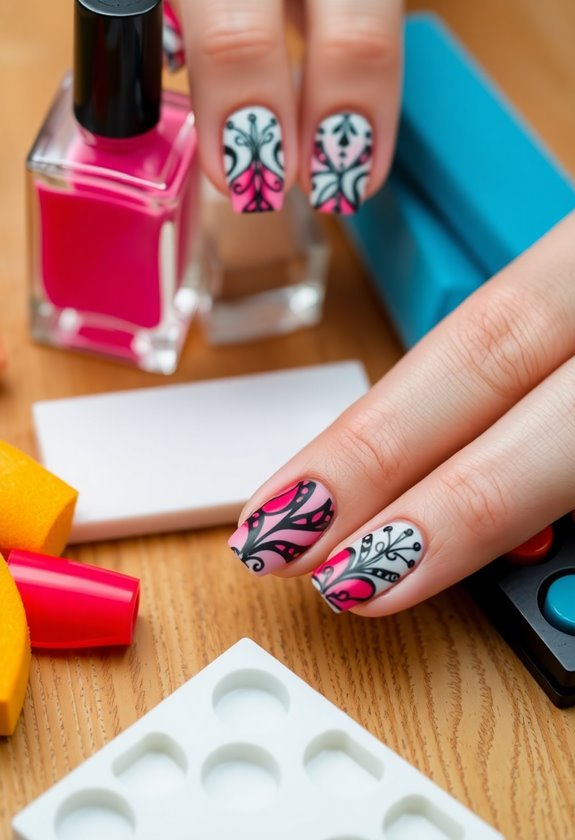
Creative Designs With Tape
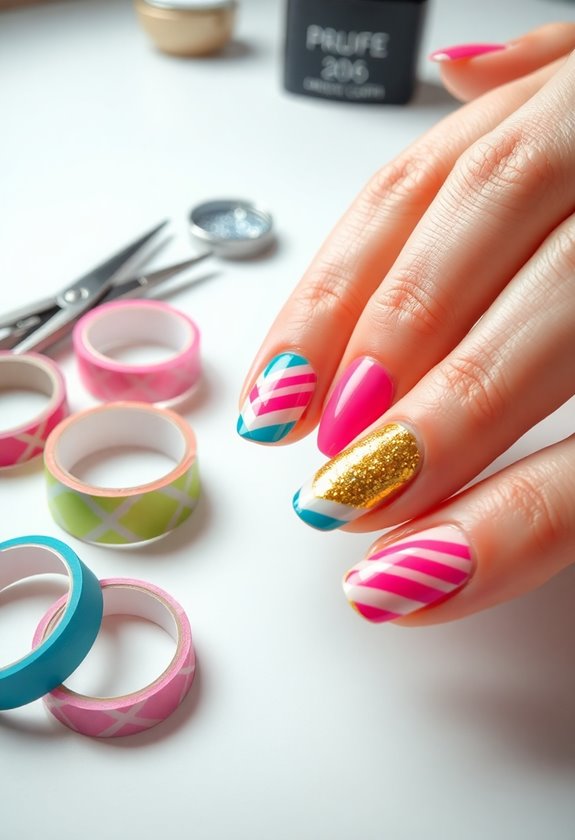
Tape can be a fantastic ally in achieving intricate nail art designs with precision and ease. I love using tape to create stunning tape designs that elevate my manicure game. One of my favorite techniques involves cutting strips of tape to form geometric patterns on my nails. First, I paint my base color and let it dry completely. Then, I apply the tape in the desired pattern, pressing it down firmly to prevent any polish from seeping underneath. After painting over the tape with a contrasting color, I carefully peel it off to reveal sharp, clean lines. This method not only saves time but also allows for endless creativity. Give it a try, and you'll see how easy it is to make your nails pop!
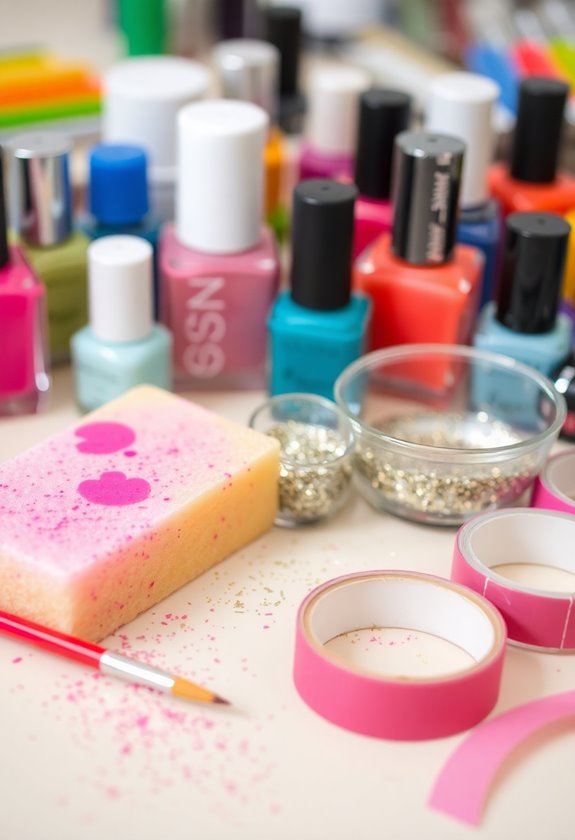
Using Household Items
You'd be surprised at how many household items can double as tools for nail art. Instead of spending a fortune on fancy tools, I love getting creative with what I already have at home. Here are some items you can grab from around the house:
- Kitchen sponges for texture and ombre effects
- Old toothbrushes to splatter paint for a fun look
- Paper clips to create intricate designs or dots
- Plastic wrap for a unique marbled effect
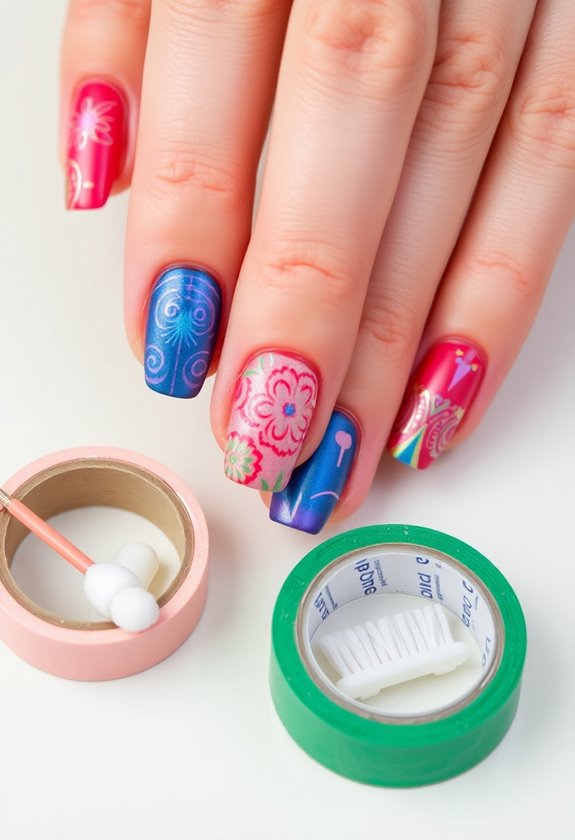
I've found that cotton swabs are perfect for clean-up or creating fine details. With a bit of imagination, you can elevate your nail art game without breaking the bank using these simple household supplies!
Easy Techniques for Beginners
With those household items in hand, I found that getting started on nail art doesn't have to be intimidating, especially for beginners. I started by experimenting with simple techniques that anyone can master. For instance, using a toothpick, I created polka dots on my nails—just dip it in polish and dot away! Another beginner-friendly method is using tape to create sharp lines; just apply it where you want your design and paint over it. Once you peel the tape off, you'll reveal a clean edge. Finally, I love sponging on nail polish for a gradient effect. It's easy and looks stunning! Trust me, with these simple techniques, you'll be amazed at what you can create.
Tips for Long-Lasting Results
To guarantee your nail art lasts as long as possible, I've discovered a few key tips that make a significant difference. Incorporating effective nail maintenance tips and mastering top coat techniques can elevate your nail game. Here are some of my favorites:
- Always prep your nails by cleaning and buffing them before application.
- Use a base coat to create a smooth foundation that helps the color adhere better.
- Apply multiple thin layers of polish instead of one thick layer for a more durable finish.
- Seal your design with a quality top coat, reapplying every few days to maintain shine and protect against chips.
Frequently Asked Questions
Can I Use Regular Paint Instead of Nail Polish?
Using regular paint instead of nail polish feels like trying to bake a cake with glue—it's a disaster waiting to happen! I've tried it, and trust me, nail polish is the way to go!
How Do I Clean up Nail Polish Spills Effectively?
When I spill nail polish, I grab some acetone and cotton balls for quick cleanup. To prevent spills, I always use a mat underneath and keep cleanup tools handy. It makes the process so much easier!
Are There Any Nail Art Ideas for Short Nails?
I once used nail stickers to create a fun polka dot design on my short nails. Minimal effort, yet stunning! You can mix colors and patterns for unique nail designs that really pop.
How Often Should I Change My Nail Polish?
I usually change my nail polish every week to maintain nail polish longevity. It keeps my nails looking fresh and prevents chipping. If I notice wear sooner, I'll definitely switch it up more frequently!
Can I Use Expired Nail Polish Safely?
Using expired nail polish feels like tempting fate! While it might seem harmless, its durability decreases over time. I always store mine safely, but I wouldn't risk it—better to stick with fresh polish!